RouterOS v7 OVPN Client配置 & 国内外地址分流(Mangle表标记路由)
0x01 前言
使用的设备是 Mikrotik RB750gr3 + RouterOS Version 7.14.1 (stable)。
v7版本网上教程比较少,踩过很多坑有很多细节需要注意,所以打算记录下。
v7对于v6版本而言,OVPN Client新增了 Auth:sha256/sha512,Cipher:ase 256 gcm,并且可以支持UDP。
大概实现逻辑拓扑如下:
``
0x02 ROS配置OVPN Client
- 首先展示下对端OVPN Server配置
[root@hk_server ~]# cat /etc/openvpn/server.conf
# 指定监听的地址和端口
local 0.0.0.0
port 1195
选择使用的协议,可以是udp或tcp
proto tcp
指定使用的网络设备名称,
dev tap是以太网桥接模式,dev tun是隧道ip模式
dev tap
指定使用的证书和密钥文件
ca /etc/openvpn/ca.crt
cert /etc/openvpn/server.crt
key /etc/openvpn/server.key
dh /etc/openvpn/dh.pem
指定分配给客户端的IP地址范围
server 10.8.0.0 255.255.255.0
指定保存客户端IP地址的文件
ifconfig-pool-persist ipp.txt
推送路由配置给客户端,重定向所有流量
push 'redirect-gateway def1 bypass-dhcp'
push 'dhcp-option DNS 8.8.8.8'
允许客户端之间通信
client-to-client
允许多个客户端使用相同证书登录
duplicate-cn
保持客户端连接
keepalive 10 120
设置认证算法
auth SHA512
设置加密算法
cipher AES-256-CBC
设置日志输出级别,将日志追加到指定文件
verb 3
log-append /var/log/openvpn.log
设置静音模式,只显示重要日志
mute 10
设置TLS-认证(注释掉,不使用,因为ROS那边不支持)
tls-auth /etc/openvpn/ta.key 0
设置脚本安全级别
script-security 3
指定用户名密码验证脚本
auth-user-pass-verify /etc/openvpn/checkpsw.sh via-env
将用户名作为公共名称
username-as-common-name
禁用客户端证书验证
verify-client-cert none
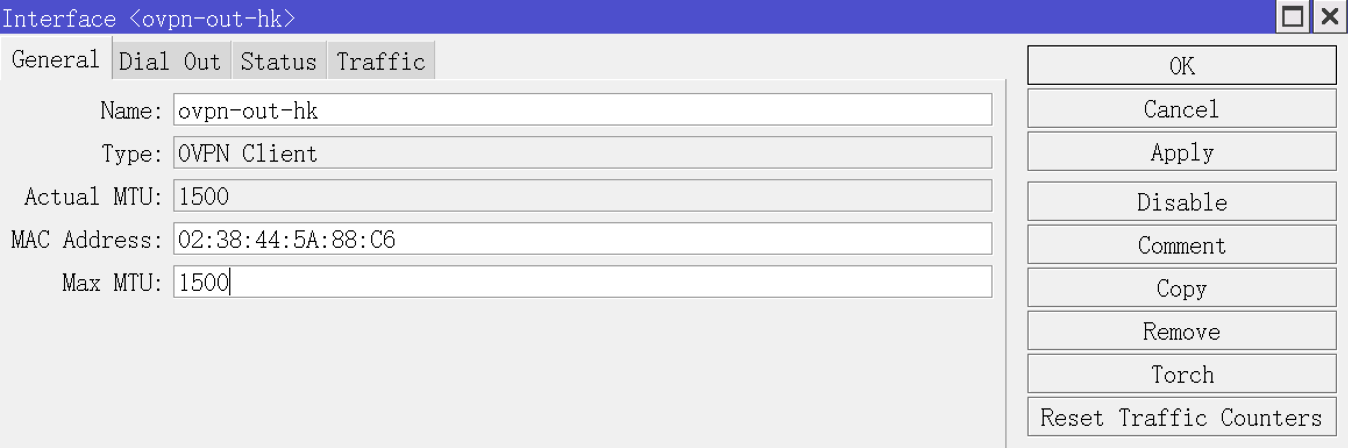
2. 进入ROS,新建一个Interface -> OVPN Client,填写Name跟Max MTU。
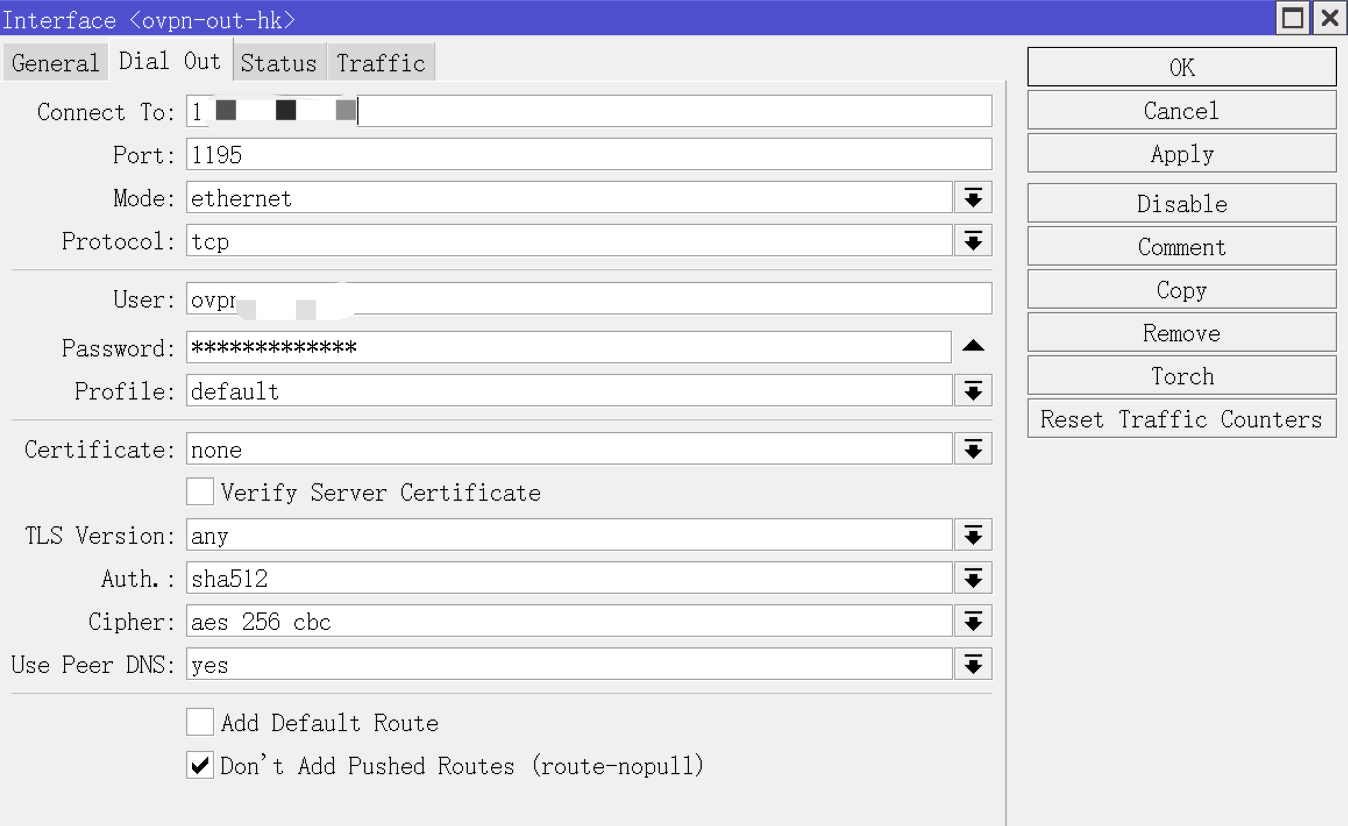
3. 填写下对端地址,接口,协议。按照对端来配置。
Mode有两种模式:ethernet对应的是dev tap 以太网桥接模式(推荐),ip对应的是dev tun 隧道IP模式。
我这边对端Server开启了用户名密码认证,然后取消了客户端证书验证。配置信息如下:
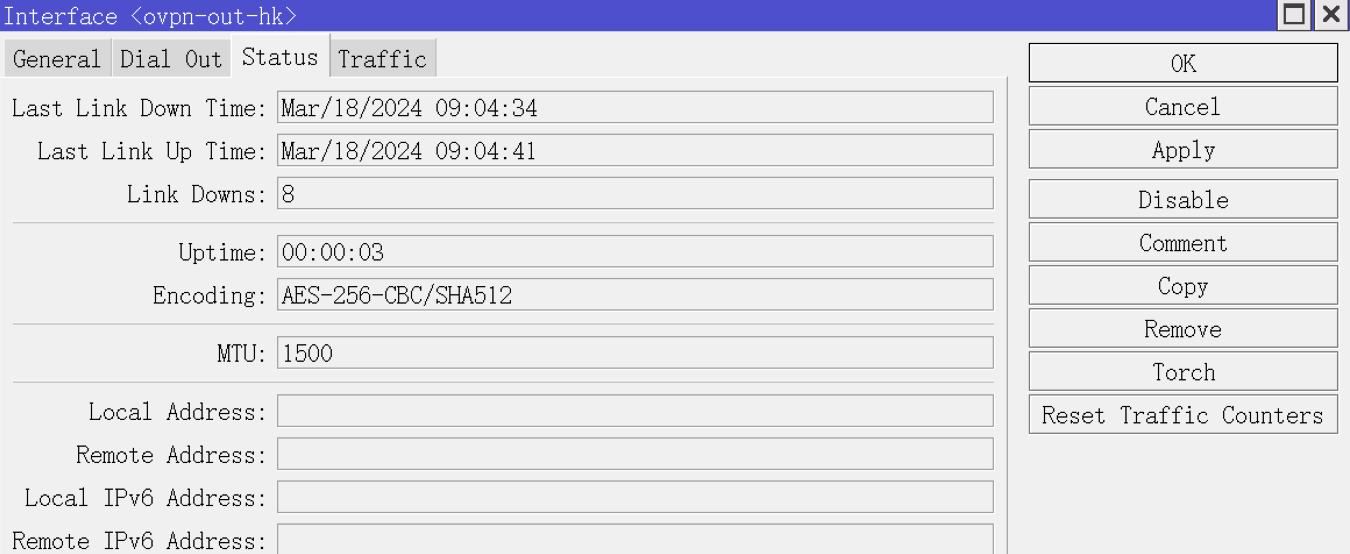
4. 完成后查看连接状态。如果连接失败,可以在两端打开日志debug一下。
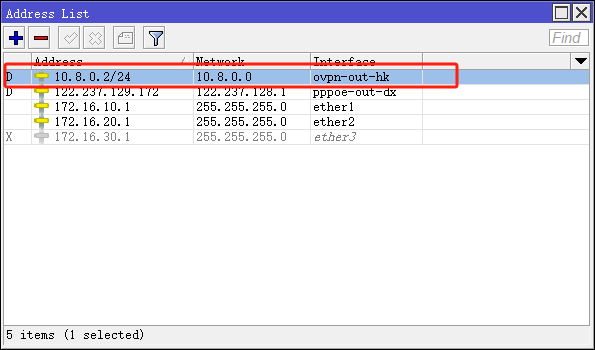
Address List也会显示地址
## 0x03 导入CN地址列表
这个v7版本跟v6 方法一样的
1. 打开ros终端,获取CN地址列表,直接[下载CN文件](https://itho.cn/content/uploadfile/custom/ros/CN)拖拽进去也可以。
```shell
/tool fetch url=http://www.iwik.org/ipcountry/mikrotik/CN-
导入地址到firewall的address lists
/import file-name=CN -
查看一下Fiewwall address lists,确认都导入成功。
注意还需要手动把私有地址段(10.0.0.0/8 172.16.0.0/12 192.168.0.0/16)&OVPN地址段(10.8.0.0/24)也加入到CN地址列表,要不然会有问题直接环了。/ip firewall address-list add address=10.0.0.0/8 list=CN add address=172.16.0.0/12 list=CN add address=192.168.0.0/16 list=CN add address=10.8.0.0/24 list=CN
0x04 流量标记&国内外分流
-
Fiewwall -> Address List 新建一个"PROXY"地址列表,把需要留学的内网IP加入里面。
/ip firewall address-list add address=172.16.10.0/24 list=PROXY add address=172.16.20.0/24 list=PROXY -
ros v7版本需要先在Routing->Tables中新建一个标签“proxy”,后面标记路由需要用到。
/routing table add disabled=no fib name=proxy -
Fiewwall -> Mangle 建立prerouting标记规则proxy,排除访问目标CN地址网段。
Extra中配置排除目的地是本地跟广播的地址。
Action为mark routing 添加路由标签为proxy。/ip firewall mangle add action=mark-routing chain=prerouting comment=proxy disabled=yes \ dst-address-list=!CN dst-address-type=!local,broadcast new-routing-mark=\ proxy passthrough=yes src-address-list=PROXY
-
建立新的静态路由,把proxy流量指定到代理网关。
需要注意:Distance写1,然后把pppoe拨号的Distance改成2,不然两个都是1会有冲突,pppoe还是作为缺省路由。
Gateway不能写接口名字,要写OVPN Client网关地址,因为上面使用的模式是以太网桥接模式。/ip route add check-gateway=ping comment=ovpn-out-hk disabled=no distance=1 \ dst-address=0.0.0.0/0 gateway=10.8.0.1 pref-src="" routing-table=proxy \ scope=10 suppress-hw-offload=no target-scope=10 -
最后记得把DHCP Server里面的DNS改成8.8.8.8,因为国内DNS有污染。
routeros ros rb750gr3 ovpn mikrotik